

10 Best Website To Buy Instagram Followers
Unlocking Instagram Success: 10 Trusted Platforms to Buy Followers [read more]
In today’s digital age, social media platforms like Instagram have become essential tools for individuals and businesses alike to expand their reach, connect with audiences, and build a brand presence. However, growing a significant following on Instagram organically can be a time-consuming process. As a result, many users turn to third-party services to purchase followers and accelerate their growth.
But with a plethora of options available, choosing a reliable platform to buy Instagram followers can be daunting. To help you navigate through the crowded market, we’ve compiled a list of ten trusted platforms based on their features, user reviews, and reputation.
1. Igfollower.co
Rating: 9.8/10
Key Features: High-quality followers, targeted audience options, instant delivery, affordable pricing, additional support for likes, views, and comments.
Igfollower.co tops our list as the premier destination for purchasing Instagram followers. With a focus on authenticity and genuine engagement, Igfollower.co ensures rapid account growth without compromising credibility.
2. Alphabetazone.com
Rating: 9.6/10
Key Features: Gradual increase in followers, secure transactions, privacy protection, targeting options.
Alphabetazone.com offers a gradual approach to follower acquisition while prioritizing user security and confidentiality. With customizable packages and targeting options, it’s a reliable choice for organic growth.
3. Buzzoid.com
Rating: 9.2/10
Key Features: 24/7 customer support, customizable packages, targeted followers, enhanced engagement.
Buzzoid.com stands out with its responsive customer support and tailored follower packages. With options for targeted followers based on interests and demographics, Buzzoid.com ensures a personalized approach to Instagram growth.
4. Viewsig.com
Rating: 9.2/10
Key Features: No password requirement, refill guarantee, organic engagement.
Viewsig.com prioritizes user security and organic engagement, offering a refill guarantee for lost followers and fostering genuine interaction with your content.
5. Goread
Rating: 9.0/10
Key Features: User-friendly platform, diverse range of packages, organic growth, real engagement.
Goread provides a seamless experience for purchasing Instagram followers, with a focus on authenticity and real engagement. With a user-friendly interface and various package options, it’s a trusted choice for enhancing your Instagram presence.
6. Famoid
Rating: 8.9/10
Key Features: High-quality followers, customer satisfaction guarantee, genuine engagement.
Famoid prioritizes customer satisfaction and genuine engagement, offering high-quality followers to boost your Instagram presence effectively.
7. Rushmax
Rating: 8.7/10
Key Features: Streamlined process, quick delivery, competitive pricing, genuine followers.
Rushmax provides a fast and efficient solution for purchasing Instagram followers, with competitive pricing and genuine followers to enhance your online presence.
8. Thunderclap
Rating: 8.6/10
Key Features: Targeted follower options, real engagement, authenticity.
Thunderclap offers targeted follower options to attract relevant audiences and foster genuine engagement with your content, ensuring effective Instagram growth.
9. Pathsocial
Rating: 8.5/10
Key Features: Genuine followers, meaningful engagement, customer support.
Pathsocial focuses on delivering genuine followers and fostering meaningful engagement, with dedicated customer support to ensure a positive experience for users.
10. Social Follow
Rating: 8.4/10
Key Features: Range of follower packages, real followers, customer satisfaction.
Social Follow offers a variety of follower packages designed to suit different needs and budgets, with a focus on providing real followers and ensuring customer satisfaction.
In conclusion, while purchasing Instagram followers can be a strategic move to accelerate your growth on the platform, it’s essential to choose a reputable and trustworthy provider. With the ten platforms listed above, you can confidently embark on your journey to Instagram success, knowing that you’re investing in quality followers and genuine engagement.
How to put restaurant in your instagram bio
Learn how to put Restaurant in your Instagram bio. Whether you have a old restaurant or just starting out, putting ‘Restaurants’ in your bio can make you stand out and connect with others who share interests in restaurants.”
So today we will tell you step by step how to put restaurants in your instagram bio.
How to add Restaurant to Your Instagram Bio
In order to add the Restaurant tag to your Instagram bio, follow these proven working methods
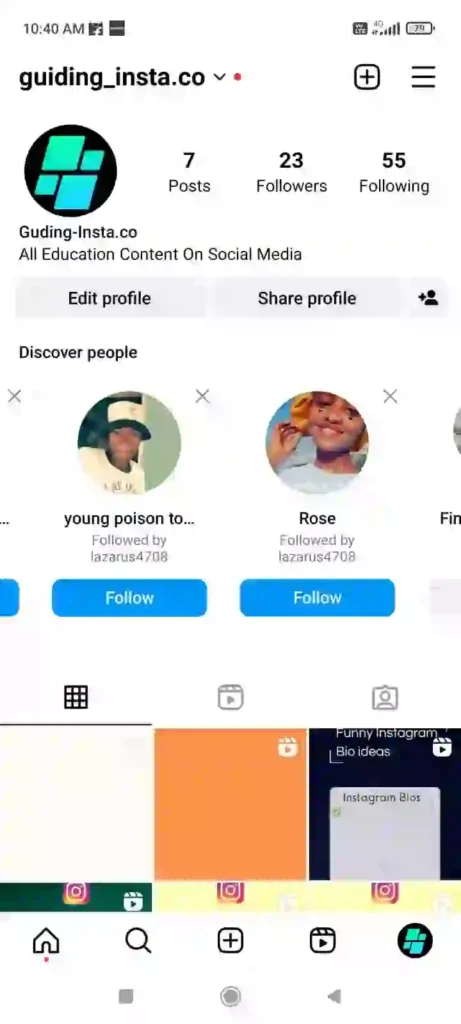
First open the instagram app now first you need to check whether you have a personal account or professional account .
In order to check your account type click to the edit profile option.
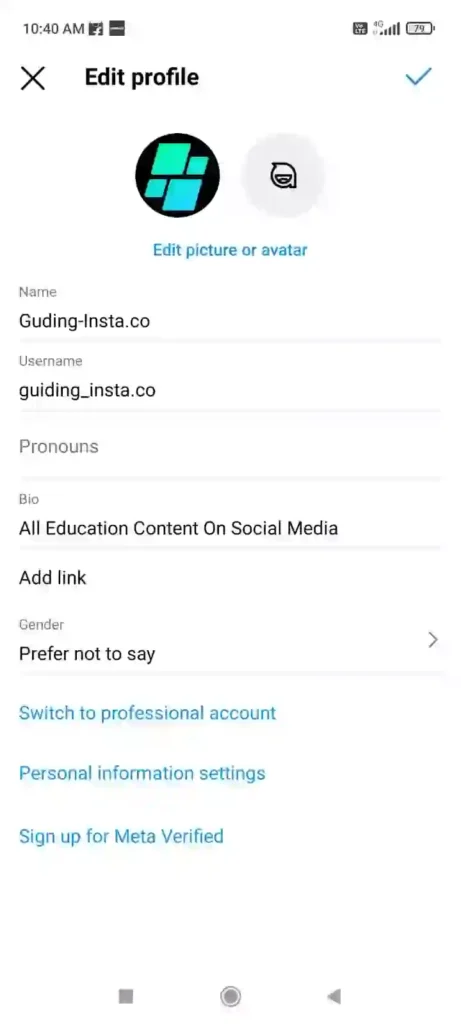
In the edit profile option you will see this type of interface and now click the switch to professional account
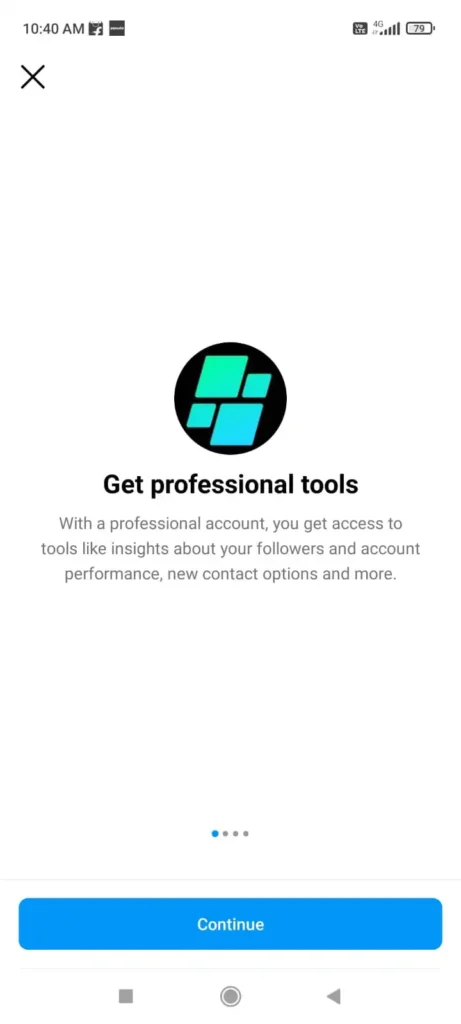
Complete all steps by clicking the continue button.
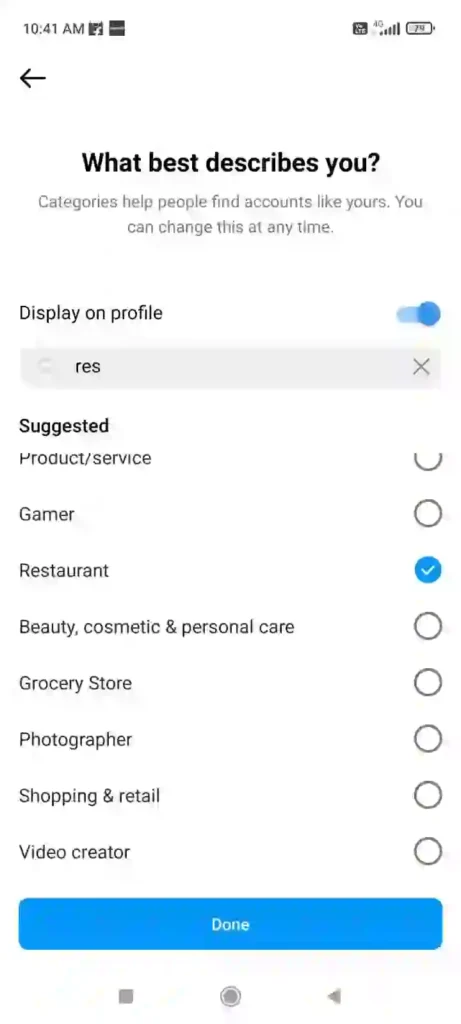
Now in this step choose the category or tag which you want to display on your profile
In my case i had choose the restaurant tag to be display on my profile once you choose the tag toggle on the display on profile button.
Now click on the done button
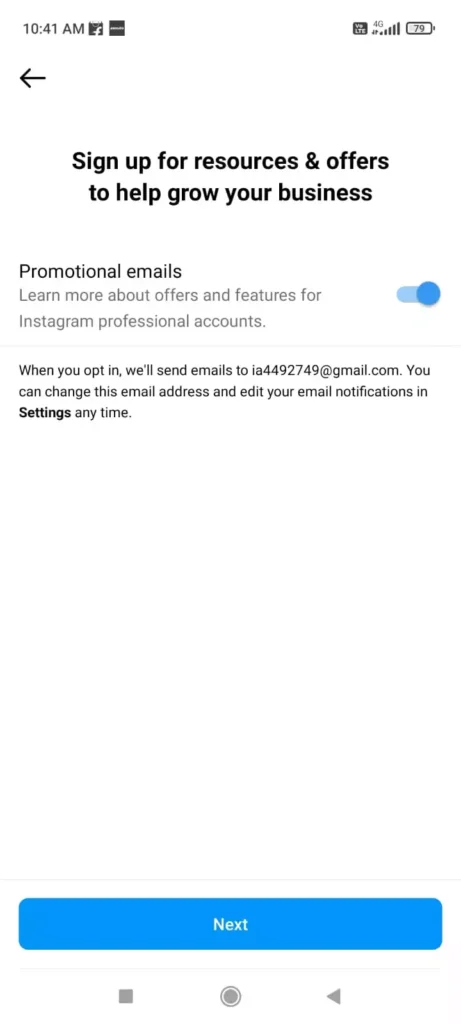
Now it will ask whether you want to sign up for promotional email send by instagram .
I will toggle off the button for promotional emails and click to the next button.
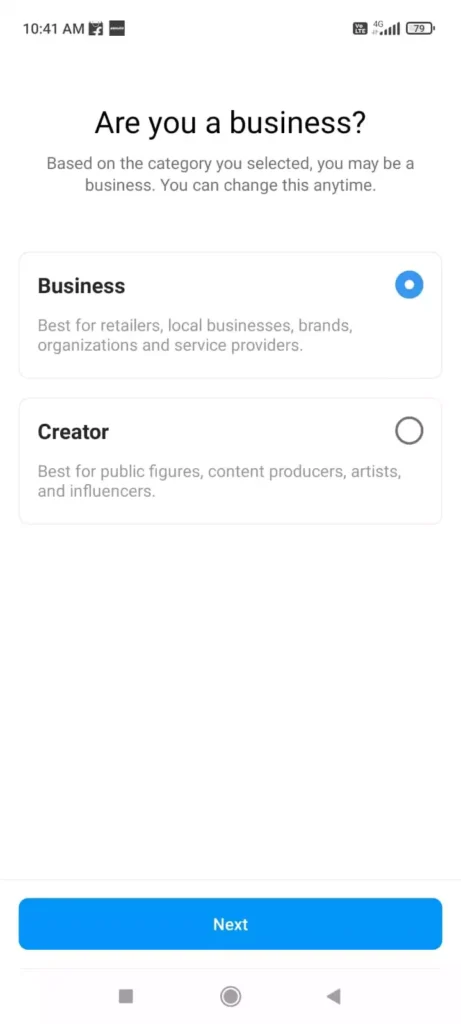
After all this step it will ask whether you are a business owner or creator.
In my case I had choose business and click to the next button given below.
After this complete all these steps in order to get professional account.
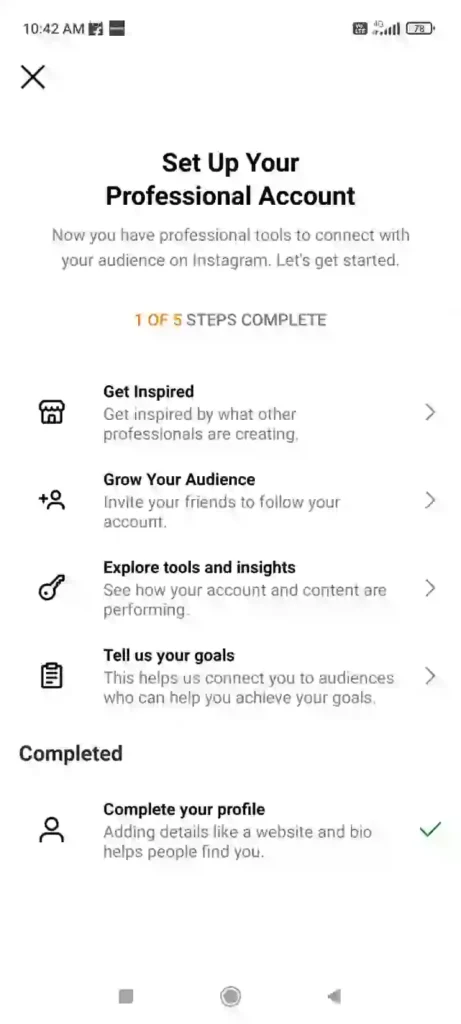
Once you complete all these steps you will see a restaurant tag below the page name.
I hope this guide was help to you in order add restaurant tag or category in your account.
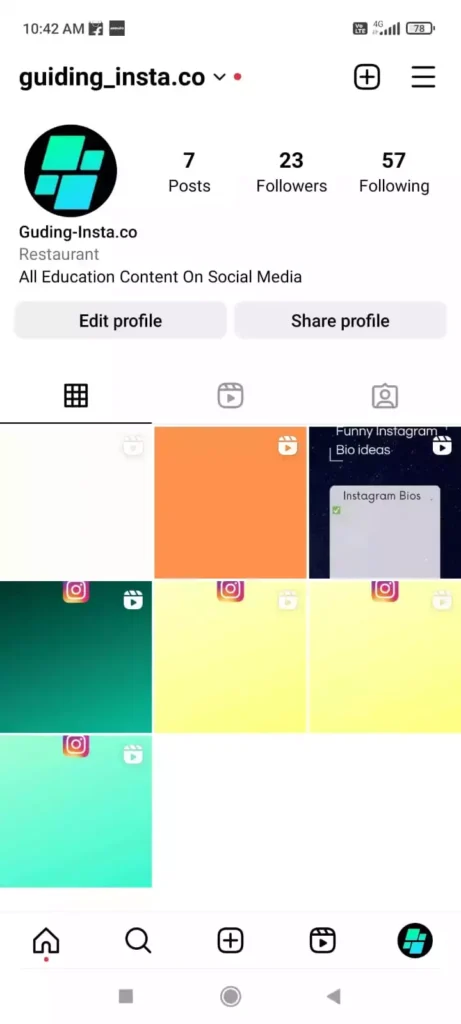
Please note if you already have a professional account then you just need to click edit profile option and select the category option and toggle on the display on profile button.
It will show your category on the instagram page.
Why Identifying as a Restaurant on Instagram Matters
Identifying as a restaurant on Instagram is really important because it helps you stand out in the busy world of social media. It’s a way to connect with foodies, potential customers, and people who love eating out. By showing your restaurant identity, you can create a unique presence on the platform and let everyone know what delicious things you have to offer.
How to Add “Restaurant” to Your Instagram Bio
To add “restaurant” to your Instagram bio, just follow these steps:
- Open the editing section.
- Choose the category option.
- Type in “restaurants” in the search bar.
- When you find “restaurant,” select it.
- Tap the checkmark to save the changes you made.
Remember, just like someone wise once said, “You won’t find something unless you look for it.” So, search for the tag you want to use.
Another Approach to Showcase Your Restaurant on Instagram
Here’s another way you can do it:
- Open Instagram.
- Go to your restaurant’s profile.
- Click on “edit profile.”
- Write “restaurant” in your bio.
- Don’t forget to save what you wrote.
Awesome Examples of Restaurant Instagram Bios
Some cool restaurants like [Restaurant Name], [Restaurant Name], and [Restaurant Name] have fantastic bios. They keep it short but tell everyone about their cuisine, atmosphere, and what makes them special.
Creating Your Own Restaurant Bio
When you create your bio, start by describing your restaurant and what kind of food you serve. Use words that people might search for, like your specialty or famous dishes. If you have any unique features or themes, put that in your bio too.
You can also add some fun or personality to your bio to make it interesting. Use emojis to showcase your style and vibe. Keep it short and sweet, around 150 characters, and remember to update it when you have new menu items or events.
Tips for adding Your Restaurant In Instagram Bio
When you want to make your restaurant’s Instagram bio better:
- Make sure to check your spelling and avoid using too many capital letters or symbols. You want your restaurant to come across as professional and appealing.
- Use relevant hashtags in your bio to help people discover your restaurant and connect with others who love food.
Fantastic Examples of Restaurant Bios
Here are some examples of restaurant bios that we think are awesome:
- [Restaurant Name]: “Serving [Type of Cuisine] with a twist! Join us for a culinary adventure. 🍽️ #FoodLovers”
- [Restaurant Name]: “Home of the famous [Signature Dish]. Come indulge in [Type of Cuisine] goodness! 🍔 #FoodieParadise”
- [Restaurant Name]: “Elegant [Type of Cuisines] dining in the heart of [City]. Where every bite tells a story. 🍷 #FineDining”
These bios are concise yet capture the essence of the restaurant, its offerings, and its ambiance. Feel free to use these examples as inspiration for your own restaurant’s bio.
In Conclusion
In a nutshell, presenting your restaurant identity in your Instagram bio holds great value. It helps you showcase your culinary delights, engage with food enthusiasts, and expand your customer base. By applying the insights and tips we’ve shared, you can craft an enticing bio, establishing a strong presence and enticing food lovers. This is how you can add the “restaurant” tag to your Instagram profile. I hope you find this information helpful!

How to block or unblock someone on instagram in 2023
If you’re facing harassment or unwanted interactions on Instagram, blocking someone can be a useful tool. It allows you to prevent a person from accessing your profile, posts, and stories.

How to Block Or Unblock Someone on Instagram
Blocking someone on Instagram is a simple and effective way to restrict access and unwanted interactions. Let’s explore different methods to block someone on the platform.
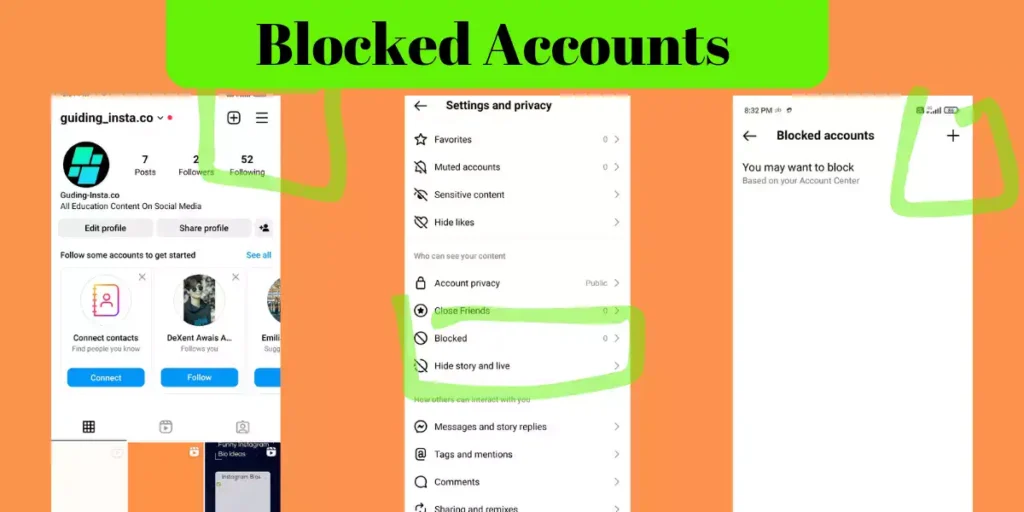
Blocking in Settings:
- Launch the Instagram app on your smartphone and access the profile section.
- Tap the hamburger menu icon and navigate to “Settings” > “Privacy.”
- Scroll down and select “Blocked accounts.”
- You can either block suggested accounts or manually add a blocked account using the “+” icon.
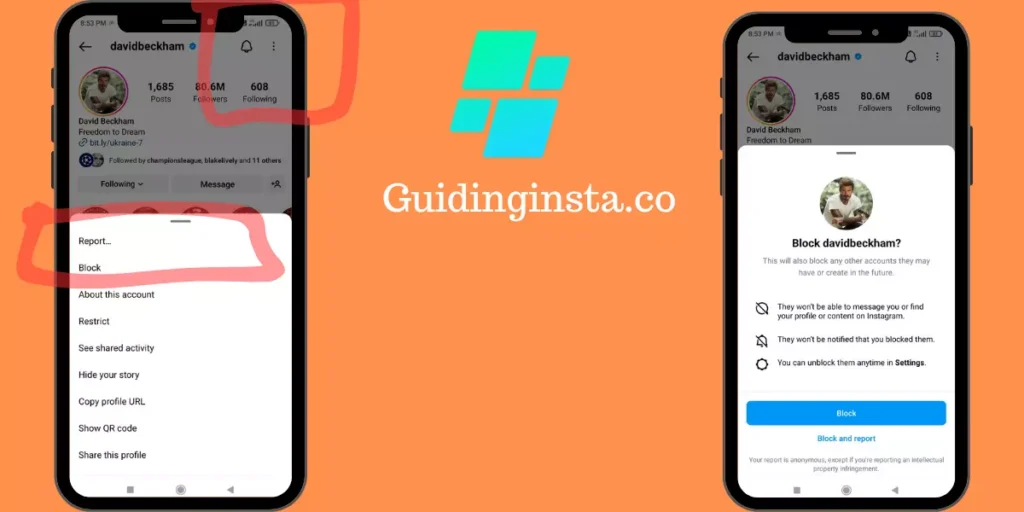
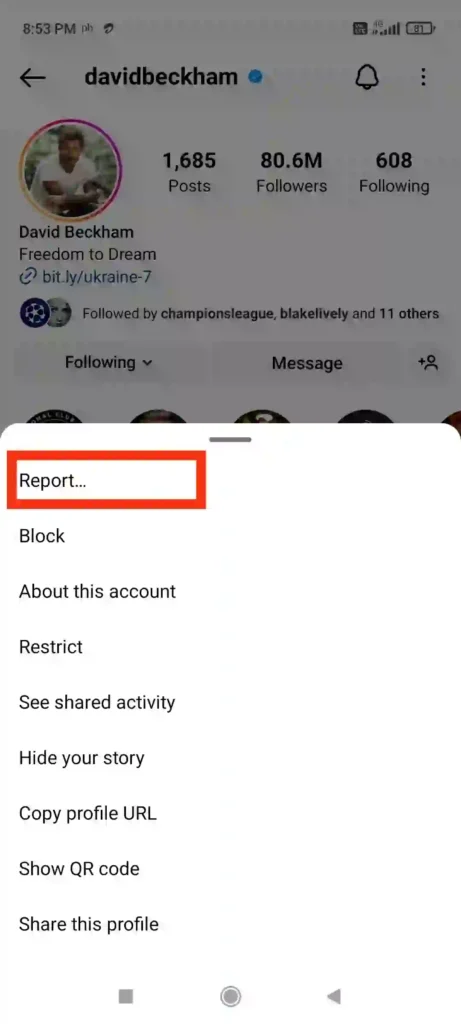
Blocking from Their Profile:
- Visit the profile of the user you want to block.
- Tap the horizontal dots menu at the top-right corner.
- Select “Block” and confirm your action.
- Blocking through Direct Messages:
- Open the Instagram app and access your direct messages.
- Find the user you want to block and open their chat.
- Tap the person’s name, scroll down, and select “Block.”
What will happen if you Bock Someone on Instagram?
Blocking a user on Instagram has several consequences that ensure a safer experience for you. Here are the main outcomes:
- Removing of Likes & Comments: If you block anyone, their likes & comments will be removed from your posts and content.
- Inability to Mention or Tag You: Blocked users cannot mention your username, tag you in comments, or interact with your posts in any way.
- Message Restriction: Once blocked, the user will no longer be able to send you messages, ensuring a communication barrier.
Accessing Your Instagram Block List Managing your blocked users can be important, especially if you have blocked multiple accounts.

Here’s how to access your block list on Instagram:
- Click on your profile icon in the Instagram app.
- Tap the three lines icon at the top-right corner.
- Navigate to “Settings” > “Privacy” > “Blocked accounts.”
- The blocked accounts list will be displayed, allowing you to unblock users if needed.
Alternative Methods to Control Interactions on Instagram Besides blocking, Instagram offers other ways to manage interactions and limit unwanted contact:
Soft Blocking:
By temporarily blocking and immediately unblocking someone, you can make them unfollow you without their knowledge. This method is useful for avoiding confrontation.

Removing a Followers:
If you no longer want someone to see your posts, stories, or videos, you can remove them as a follower. This action requires the person to re-follow you to regain access.
Restricting Someone:
Instagram’s “Restrict” feature allows you to limit someone’s visibility on your profile without notifying them. They can still view your content, but their interactions are hidden.
Blocking Comments:
To prevent specific users from leaving inappropriate comments, you can block them from commenting on your posts. Their comments will only be visible to themselves.
Hiding Your Story:
You can selectively hide your story from specific followers, ensuring they won’t see your story updates.
Muting:
If you want to limit someone’s posts from appearing in your feed without blocking or unfollowing them, you can mute their profile.

Frequently Asked Questions about Instagram Blocking To address common queries related to Instagram blocking, here are brief answers:
1: How to Block Someone on Ig without let them Knowing?
Blocking someone on Instagram does not trigger a notification to the user.
2: Will You Block Someone Who Blocked You on Ig?
You cannot directly block someone who has already blocked you on Instagram.
3: Can You Block Someone on Instagram If You Don’t Follow Them?
Yes, you can block someone on Instagram even if you don’t follow them.
4: How to Block Someone from Seeing Likes on Instagram?
Instagram does not provide a specific option to block someone from seeing your likes.
5: How to Block Someone on Instagram Messages?
You can block someone from sending you messages by following the steps mentioned earlier in the article.
6: How to Block Users from Seeing Your Posts on Ig?
Instagram does not offer a direct option to block someone from seeing your posts, but you can utilize other methods mentioned above to limit their visibility.
Conclusion:
Understanding how to block someone on Instagram is crucial for maintaining a safe and positive online experience. By following the steps outlined in this comprehensive guide, you can effectively block and manage unwanted interactions, ensuring a more secure Instagram environment for yourself or your children.
However, if you change your mind later on, you can easily reverse the action. Here are the steps you need to follow to unblock someone on Instagram quickly.
How to Unblock Someone on Instagram?
If you decide to give someone access again or change your mind about blocking them, unblocking is a straightforward process. Here are two methods to unblock someone on Instagram:
Unblocking from Settings:
- Launch the Instagram app and go to your profile section.
- Access the “Settings” through the three horizontal lines menu.
- Tap “Privacy” and select “Blocked accounts.”
- Click the “Unblock” button next to the user’s name to unblock them.
Unblocking from Their Profile:
- Visit the profile of the user you want to unblock.
- Look at the unblock icon at the top of their profile.
- Confirm the unblocking action when prompted.
I hope this guide was helpfull if you like this article then please like an share this article with your friends and family.
Fix Instagram Crashing while posting; pics, story, reel
7 Easy way to Resolve the Issue Permanently
Share your love
Are you frustrated with Instagram crashing repeatedly? Whether you’re trying to post a story, create reels, or simply upload content, constant crashes can be disheartening. In this article, I’ll provide you with a comprehensive guide to fix Instagram crashing issue once and for all.
Step 1: Identify the Reasons Why Instagram Keeps Crashing
Before diving into the solutions, it’s important to understand the underlying reasons behind Instagram crashes. Here are some possible causes:
- Device compatibility issues

2. Bugs in the recent Instagram update

3. Installation of third-party apps from unverified sources

4. Data corruption within the Instagram app
5. Instagram server downtime
Now, let’s move on to the methods and techniques to resolve the crashing problem permanently.
Step 2: Uninstall and Reinstall the Instagram App to Fix Instagram Crashing
Uninstalling and reinstalling the Instagram app is a straightforward yet effective step to address crashing issues. Follow these simple instructions:
- Uninstall the Instagram app from your device.
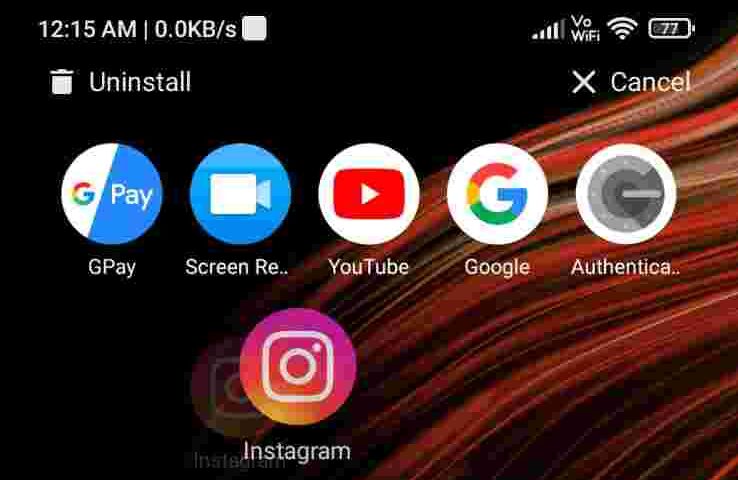
2. Restart your phone.

3. Reinstall the Instagram app from the respective app store.
4.Log in to your Instagram account.
By performing these steps, you can resolve many common crashing problems.
Step 3: Clear the Cache of the Instagram App
Clearing the cache can often help in resolving app crashes. To clear the Instagram cache, follow these steps:
- Open your device’s settings.
2. Go to “Apps” or “Applications.”
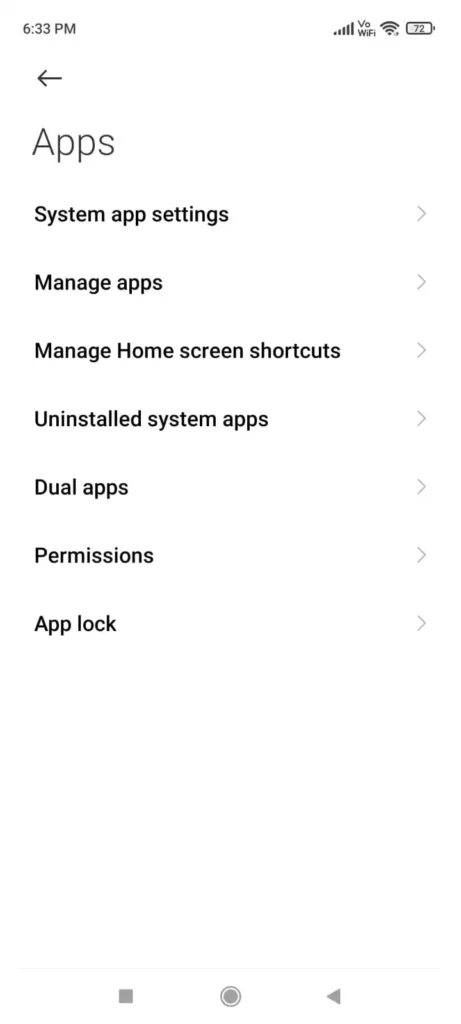
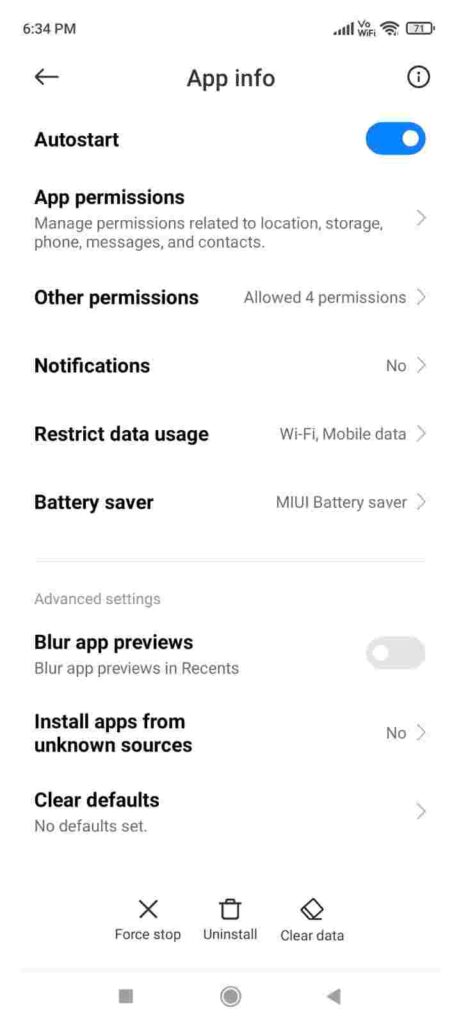
3. Search “Instagram” from the list of already installed apps.
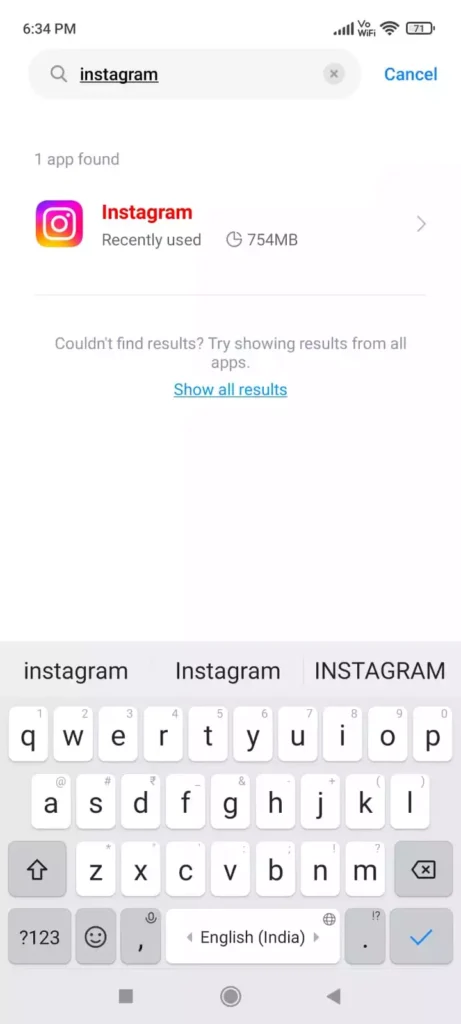
4. Tap on the arrow button to open settings
5. Find and tap on the “Clear The Data” button.
6. Close all running apps on your device.
After clearing the data, relaunch the Instagram app. This should significantly reduce the likelihood of crashes.
Step 4: Manage Internal Storage and Uninstall Unnecessary Apps
Proper management of internal storage is crucial for app stability. Consider the following steps:
- Transfer files from internal storage to external storage to free up space.
- Delete unnecessary or unused apps that may be causing conflicts.
- Disable notifications from apps that frequently disturb your device’s performance.
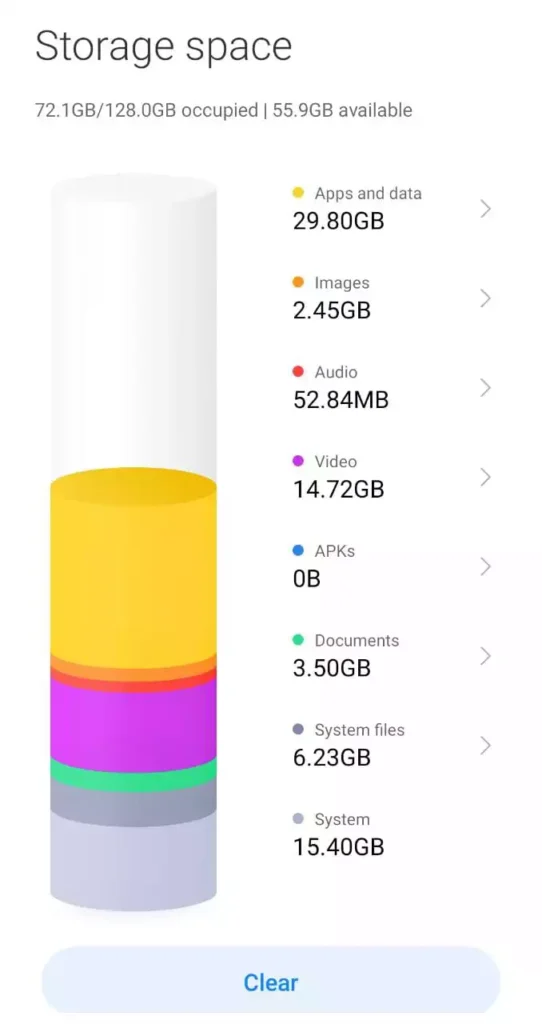
By optimizing your device’s internal storage and removing unnecessary apps, you can enhance the overall stability of your Instagram experience.
5. Keep the Instagram app and other system apps updated.
Follow these steps:
For iOS (iPhone/iPad):
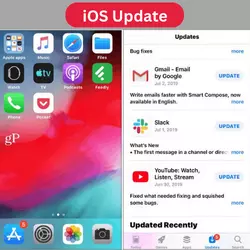
- Open the App Store on your device.
- Tap on the “Updates Section” avaliable at the bottom right corner of the screen.
- If an update is available for Instagram, you will see it listed under the “Pending Updates” section.
- Find the Instagram app and click on the update button next to it. If you don’t see the update, pull down on the screen to refresh the page.
- Wait for the update to download and install. Once the update is complete, you’ll have the latest version of Instagram installed on your device.
For Android:
- Firstly Open Play Store on your device.
- Click on the three horizontal lines in the top-left corner of the screen to open the menu.
- From the menu, select “My apps & games” or “Updates” (the exact wording may vary depending on your device).
- If an update is available for Instagram, you will see it listed at the top of the Updates page.
- Find the Instagram app and click on the update button next to it. If you don’t see the update, swipe down on the screen to refresh the page.
- Wait for the update to download and install. Once the update is complete, you’ll have the latest version of Instagram installed on your device.
Note: Make sure you are connected to a stable internet connection while updating the app. Additionally, if your device settings are set to automatically update apps, the Instagram app will be updated automatically when a new version is available.
6. Restart your device periodically to clear temporary files and refresh the system.
Restarting your device periodically can indeed help clear temporary files and refresh the system. It can improve overall performance and resolve minor software glitches. Steps to restarting phone given below.
For iOS (iPhone/iPad):
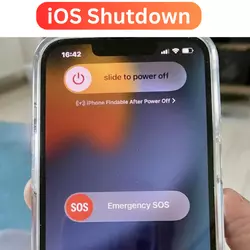
- Press and hold the power button (located either on the top or side of the device) until the “Slide to Power Off” slider appears on the screen.
- Swipe the given slider from left to right to turn off your device in some device it should be different.
- Once the screen goes black and the device is fully turned off, press and hold the power button again until the Apple logo appears.
- Select the power button, and your device will restart.
For Android:
- Press and hold the power button on your device until the power menu appears.
- Tap on the “Restart” or “Reboot” option from the menu. If you don’t see these options, tap on “Power Off” to turn off your device.
- After your device is fully powered off, press and hold the power button again until it vibrates or the manufacturer logo appears.
- Release the power button, and your device will restart.
By performing a restart, you can help clear temporary files and give your device a fresh start, potentially improving its performance.
7. Ensure a stable internet connection when using Instagram.
Having a stable internet connection is crucial for using Instagram without interruptions and delays. Here are some tips to ensure a stable internet connection while using the app:
- Connect to a reliable Wi-Fi network: If available, connect your device to a Wi-Fi network with a strong and stable signal. Wi-Fi generally offers faster and more reliable internet access compared to mobile data connections.
- Check your signal strength: If you’re using mobile data, ensure that you have a strong signal from your mobile network provider. Weak signals can result in slow or intermittent internet connectivity.
- Restart your router or modem: If you’re experiencing issues with your Wi-Fi connection, try restarting your router or modem. This can help resolve any temporary network glitches.
- Move closer to the router: If you’re experiencing weak Wi-Fi signal strength, move closer to the router or access point to improve the signal quality.
- Avoid network congestion: In crowded areas or during peak times, internet speeds can be affected due to network congestion. If possible, try using Instagram during non-peak hours or in areas with fewer people.
- Disable data-saving modes: Some devices offer data-saving modes that limit background data usage. While these modes can help conserve data, they may also affect the performance of apps like Instagram. Consider disabling data-saving modes if you’re experiencing slow or inconsistent connectivity.
- Update your Instagram app: Keeping your Instagram app up to date ensures that you have the latest bug fixes and performance improvements, which can help optimize your app experience.

By following these tips, you can help ensure a stable internet connection while using the Instagram app, allowing for smoother and uninterrupted usage.
- If you encounter issues specific to Android, update apps like Android System WebView and Google Play services. For iOS users, report any problems to the developers through the App Store.
By following these recommendations, you can significantly reduce the likelihood of Instagram crashes and enjoy a smoother experience on the platform.
Conclusion:
In conclusion, Instagram crashes can be frustrating, but by following the steps outlined in this guide, you can effectively resolve the issue. Remember to uninstall and reinstall the app, clear the cache, manage internal storage, and uninstall unnecessary apps. Additionally, keep your apps and system updated, restart your device periodically, and maintain a stable internet connection.
We hope you find these tips helpful in fixing the Instagram crashing problem. Feel free to leave your Instagram handle in the comments so we can connect.
Guide to permanently delete or temporarily deactivate your Instagram account
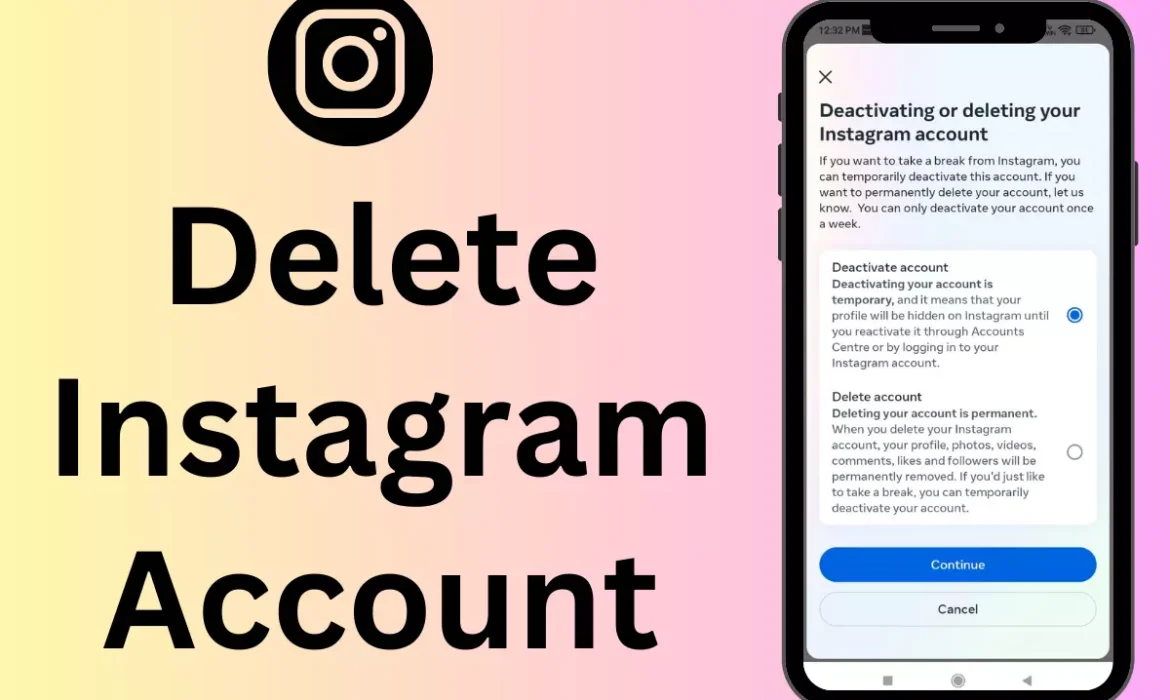
Setting up an Instagram account is a breeze, and the joy it brings while browsing the feed and reels is unparalleled. However, there may come a time when you contemplate permanently delete or temporarily deactivate your Instagram account. Accomplishing this task can be a challenge in itself.
To assist you, we have prepared a step-by-step guide that outlines the process of deleting your Instagram account. Whether you wish to delete it permanently or deactivate it temporarily, this guide will provide the necessary instructions.
When should you consider deactivating your Instagram account? If you’re planning to take a temporary break and don’t want to lose your followers and posts, deactivating your Instagram account is a suitable option.
Deleting your instagram account is crucial. Be prepare to download all your Instagram data, including photos, reels, and videos. This ensures that you have a backup of your content in case you change your mind or decide to switch to another platform in the future.
How to download all your Instagram data, including photos, reels, and videos ?
To download all your Instagram data, including photos, reels, and videos, you can follow these steps:
- First go to the Instagram app or go to the Instagram website on your computer.
- Log in to your Instagram account using your credentials.
- Click to your profile by tapping on your profile picture in the bottom right corner of the app or by clicking on your profile picture at the top right corner of the website.
- On your profile page, click on the hamburger menu (three horizontal lines) at the top right corner of the screen.
- In the menu that section select “Your Activity.”
- Scroll down at the bottom and select the download your information
- Under this you will see request to download.
- Once you will click it will show 2 options.
a) Complete copy
b) Select types of information
Then select complete copy of your app data. Now you will see a page where you page information is showing. Select the submit request button.
It will take up-to two weak to instagram send you a downloadable link which contaning all data of your app in zip file.
Note: You have only four days to download this data
How to permanently delete your Instagram account:
In this guide I will tell you a step by step process to delete your instagram account.
First open your instagram app and login with your account credentials which you want to delete after this click to three line icon hamburger like button on the profile page.
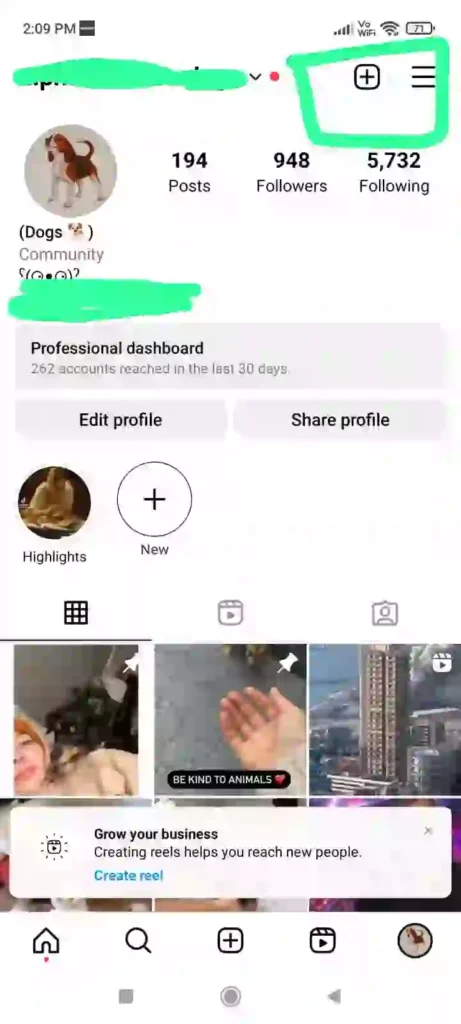
Click on the button and proceed to settings.
Here you will the first option which is account center. Now click on it.
In the second step select the personal details tab and you will find your personal details
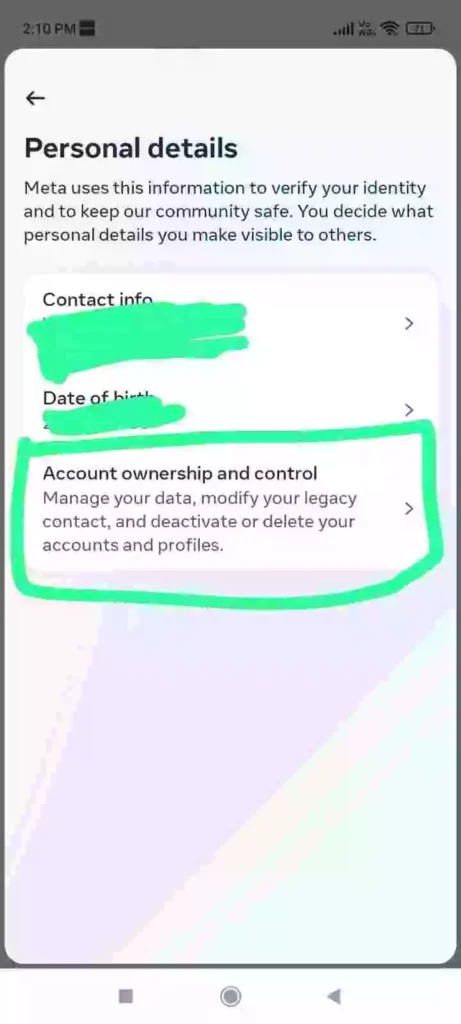
In the 3rd step select account ownership and controls.
In the 4th step click to your profile and you will with both deactivation or deletion option
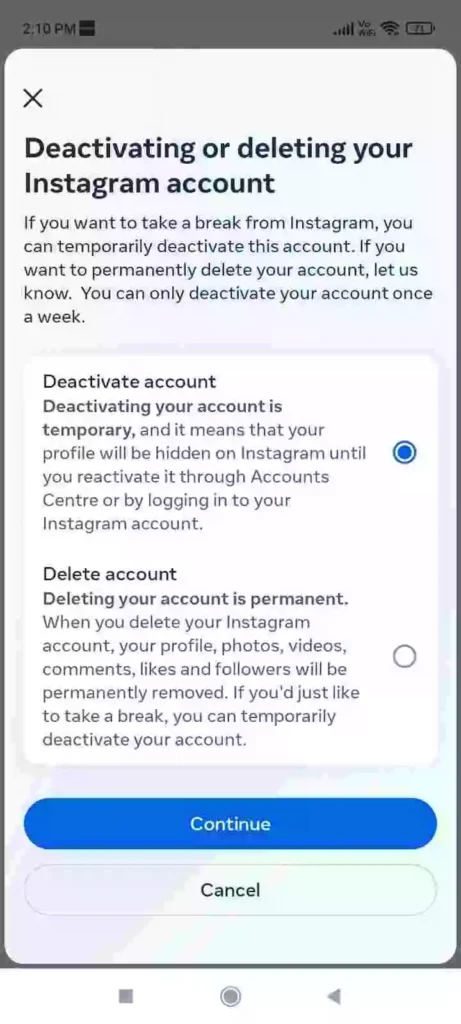
How to temporarily deactivate your Instagram account:
Did you know that Instagram allows you to temporarily disable your account for any duration of your choice? This feature provides the freedom to remove your account from Instagram, making your profile invisible on the platform. By deactivating your account, you can hide your photos, videos, likes, and comments from social media. To temporarily deactivate and reactivate your Instagram account, you can use a web browser on a PC or mobile.
Follow the instructions above to temporarily disable your Instagram account:
Frequently Asked Questions (FAQs):
Q: Are deactivating an Instagram account and deleting an Instagram account the same thing?
A: No, they are two distinct actions. Deactivating an account allows you to regain access at any time, while deleting an account means you cannot access it after the 30-day period and must create a new Instagram account.
Q: What happens to Instagram data after deleting an account?
A: Instagram may take up to 90 days or longer to completely delete an account. Data can be stored for an extended period to address any legal issues. For more information, refer to Meta’s Privacy Policy.
Q: Can I delete or temporarily deactivate your Instagram account without a password?
A: No, it is not possible to delete or deactivate an Instagram account without a correct password. If you have forgotten your password, you should reset it before proceeding.
Q: Is it necessary to delete my Instagram account if it has been hacked?
A: No, not necessary to permanently delete the account. Change your password and activate two-factor authentication for enhanced security.
I hope this guide was helpfull to you please like and share this article with in your group.
How to turn off comments on instagram ?
Use the content table to get to the section of your choice.
- How To Turn Off Comments On Instagram Reels?
- How To Turn Off Comments On Instagram Live?
- How To Turn Off Instagram Comments For All Posts At Once?
- How To Turn Off Comments On Instagram After Posting?
- How To Turn Off Comments On Instagram Before Posting?
- How To Turn Off Comments On Instagram Story?
- How To Report, Restrict, And Block Comments On Instagram?
- How To Delete Multiple Comments On Instagram?
- How To Hide Comments On Instagram?
- How To Limit Comments On Instagram?
- Automate Hiding & Deleting Instagram Comments And Save Time
- Can You Turn Off Comments On Instagram Ads?
- Frequently Asked Questions
How To Turn Off Comments On Instagram Reels?
If you are also frustated with lots of spam instagram REEL comments let me tell you a quick and simple way to off instagram comments.
If you want to off the comment for post or reel you can use this way to off the instagram comment. First you need to open the instagram app and click to your account.
Now you need to open that particular reel , post or video to turn off the instagram comments.
After this click on the three line icon at the top right corner of the screen and scroll to turn off comments.
Now no one is able to comments on that particular reel , video or post.
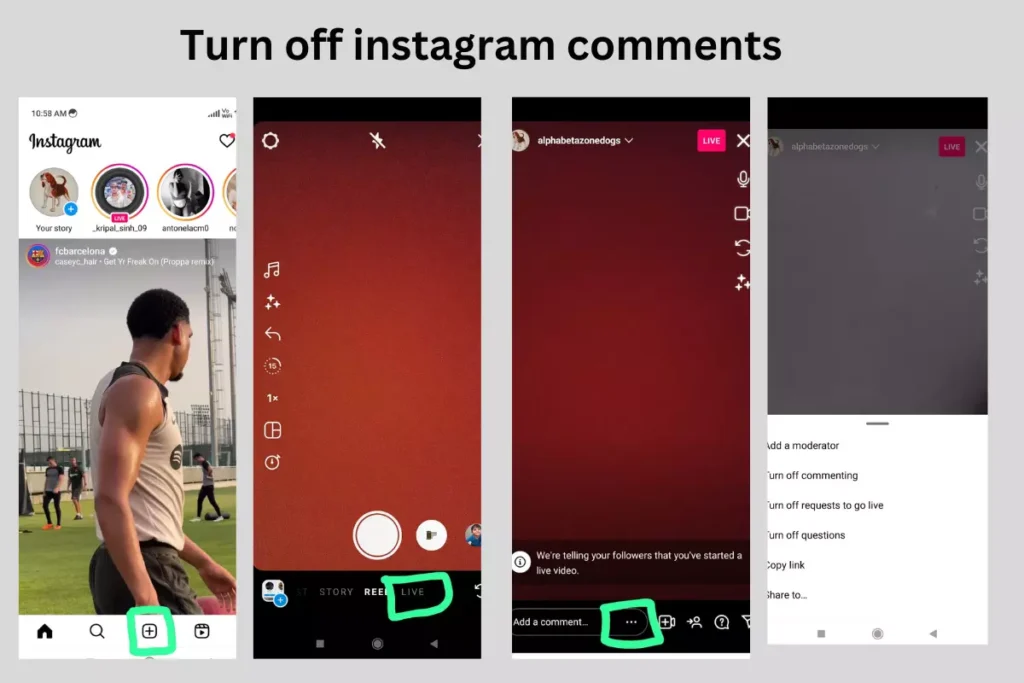
Turn off comments on instagram live?
Instagram Live allows you to easily manage the comments by turning them on or off whenever you prefer. Follow the steps below to control the comment settings:
- Open your Instagram app and tap on the center-located “+” icon. Then select “Live” from the options.
- Start your live stream by tapping on the designated button.
- Within the comment field, locate the three horizontal dots menu.
- Tap on the menu to reveal a list of options, and choose “Turn off commenting.”
- You will now notice that the comment box displays “Comments off,” indicating that viewers are unable to comment on your live video. If you wish to re-enable comments, simply tap on the same three horizontal dots menu and select “Turn on commenting.”
How To Turn Off Instagram Comments For All Posts At Once
There is no direct way to turn off comments for all post but I will tell you a simple and easy way to turn off comments on instagram for all post.
First open your instagram app and login to your account.
Now go to setting and privacy option now scroll down and select comments section.
Here you will find the comment section setting. Now go to allow comments from.
Four option for comments setting are given
- Everyone
- People you follow (Recommend)
- Your followers
- People you follow and your followers
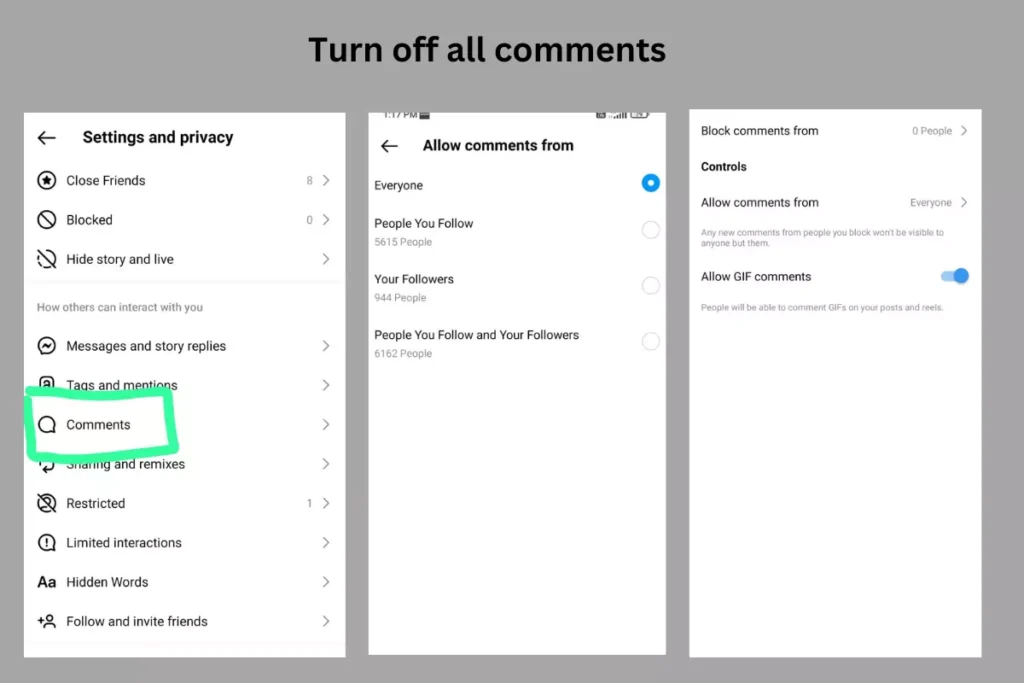
By choosing the second option you will turn off comments for all other users.
Now only those people will comment on your post which you follow. So if you follow only 1 then only one user can comment on your post, reel or video.
How To Turn Off Comments On Instagram After Posting?
First open you app and click to that particular post now click on the three line icon at the top right corner of the post.
After this click turn of commenting for that post.
Its done.
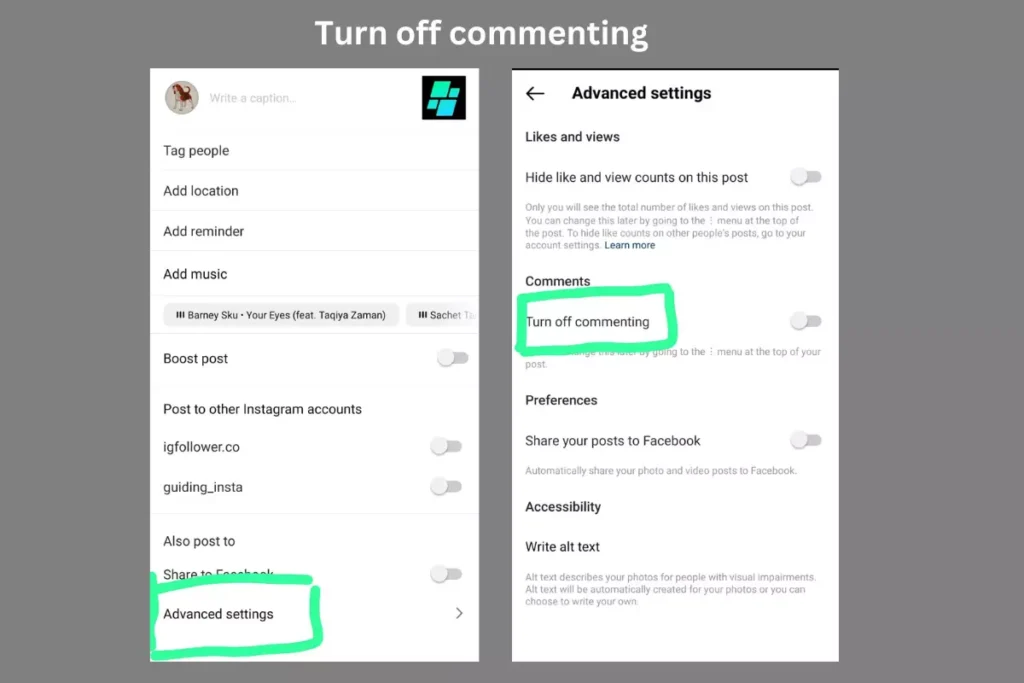
How To Turn Off Comments On Instagram Before Posting?
Step By Step Process
- Open Instagram and create a new post. Apply filters or edit the content as desired, and then proceed by clicking “Next”.
- Prior to clicking “Share”, locate and click on “Advanced Settings” at the bottom of the screen.
- Within the advanced settings, locate the slider labeled “Turn Off Commenting” and select it to disable comments.
- Once comments have been successfully turned off, click “Share” to publish your post.
- Congratulations! Commenting has now been effectively disabled for this specific post.
By following these steps, you can ensure that comments are disabled on your post before sharing it with others.
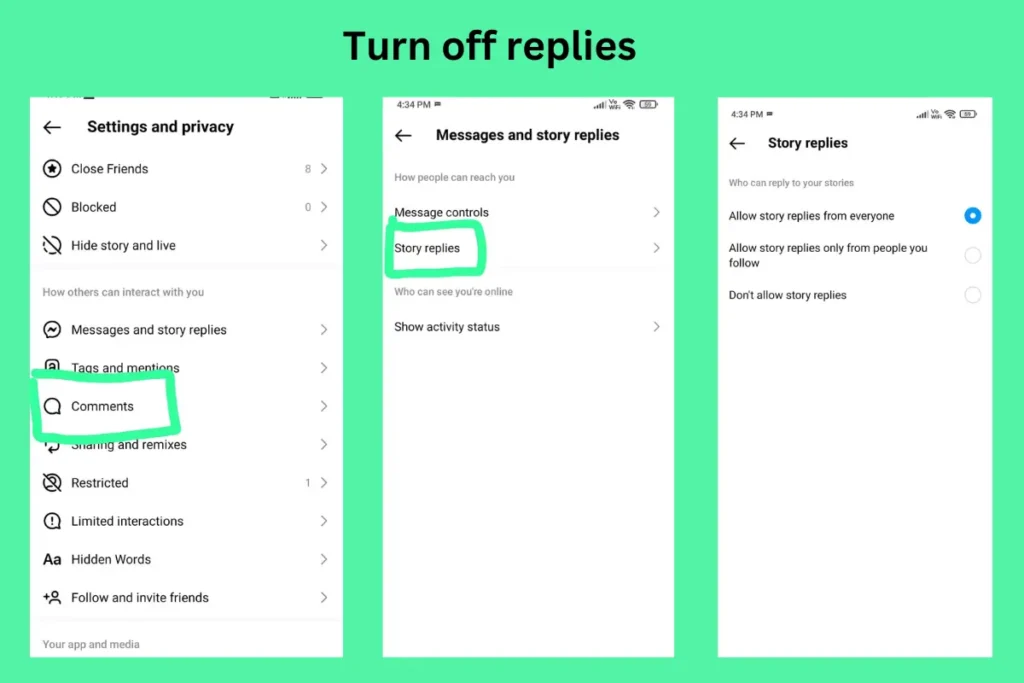
How To Turn Off Comments On Instagram Story?
To disable message replies to your story on the Instagram app, follow these steps:
- Open the IG app and go to your profile.
- Tap on the hamburger icon located on the top right of the screen. This will open the menu.
- From the menu, select “Settings.”
- In the Settings menu, choose “Privacy.”
- Under the “Interactions” section, tap on “Story.”
- Now, locate the “Allow message replies” option and tap on it.
- In the following screen, select “Off” to disable all message replies to your story.
By following these steps, you will successfully disable message replies for your Instagram story, ensuring that users cannot send you messages in response to your story.
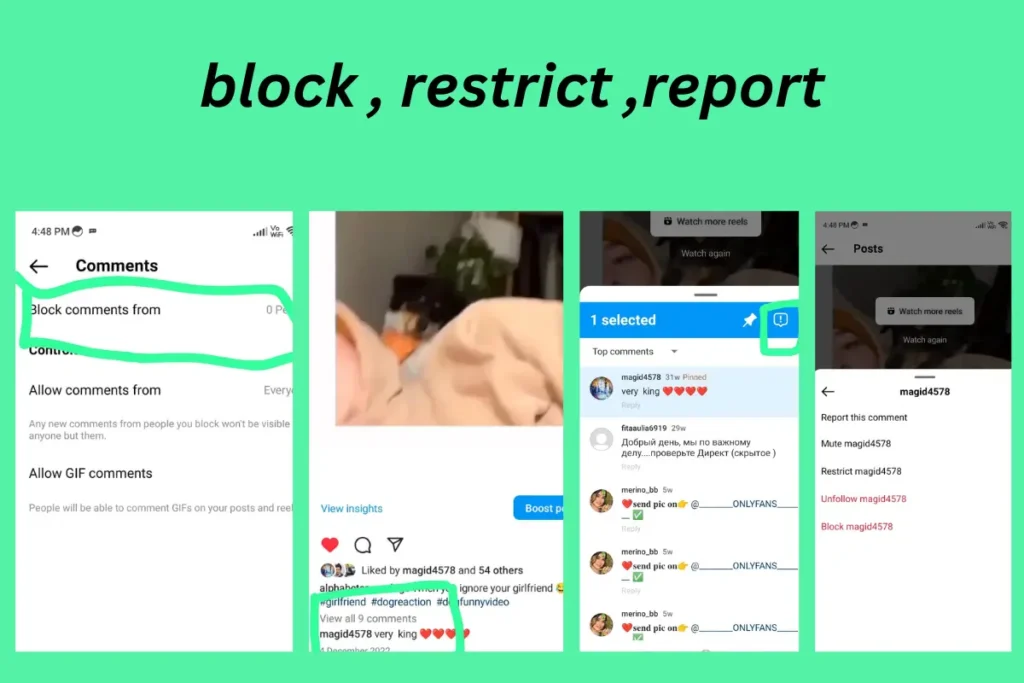
How To Report, Restrict, And Block Comments On Instagram?
For Blocking Of Comments:
Tap the top left, then tap Privacy and settings. Above How you can engage with others, tap Comments. Adjacent to Restricting comments by, tap Individuals. Input the name of the individual you wish to restrict, then tap Restrict beside their name.
Restrict & Block
First open you instagram app and go to that post on which you want to off comments.
Now click to comment to open all comments and long press to that comment which you want to restrict or report.
After this it will show blue and above you will see restrict icon tab on that.
Here you will restrict and report option for that particular comment.
Hope this tutorial will solve your problem
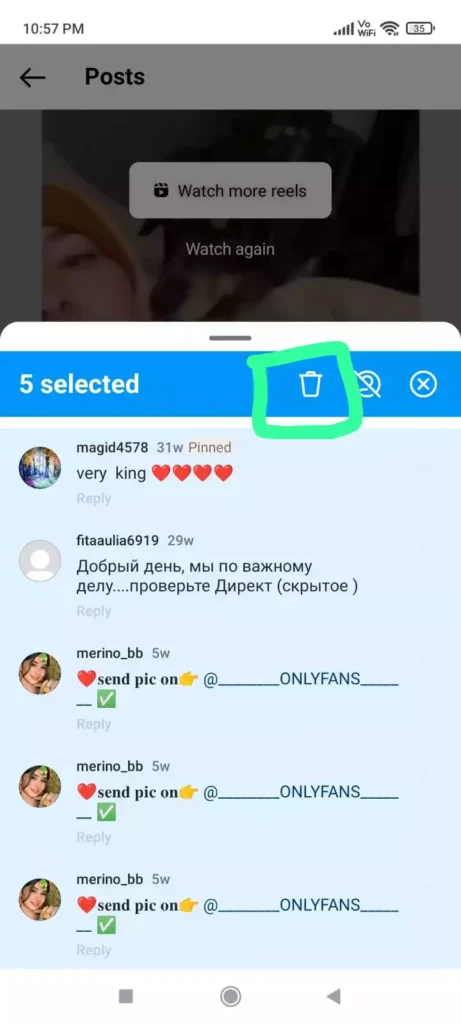
How To Delete Multiple Comments On Instagram?
First open your instagram app and tab on the comment section of that post. Tap and hold the comment it will selected . Now repeat this multiple time in order to select all those comments which you want to delete.
After this click to delete button to delete those comments.
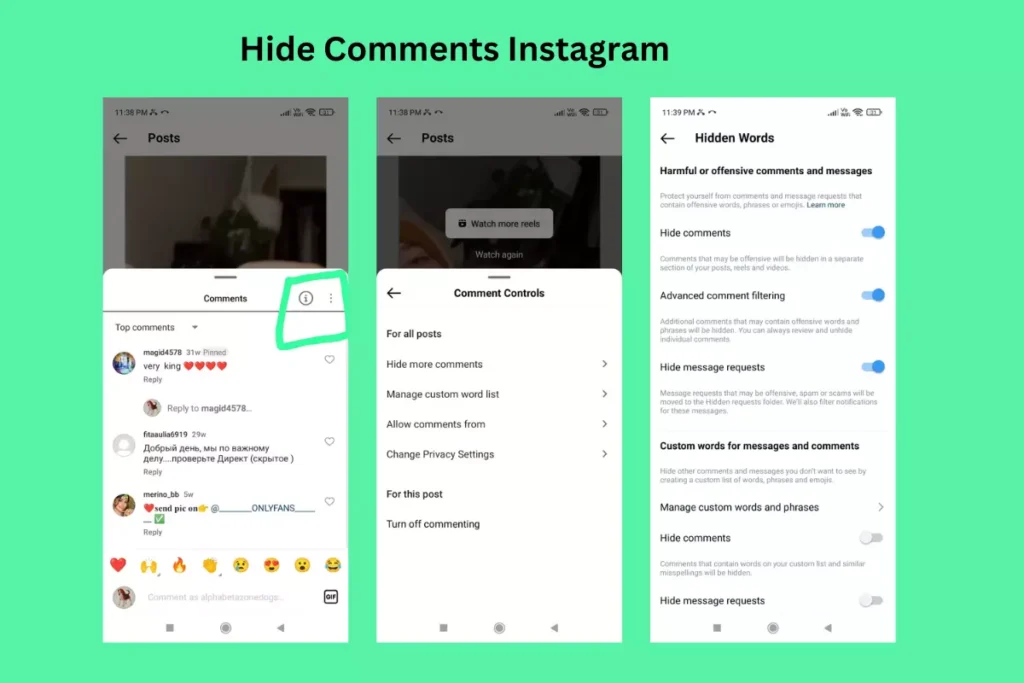
How To Hide Comments On Instagram?
Hiding comments on instagram is so easy you need to do some settings in order to hide comments on instagram.
First open your instagram app .
Now click to that post and open the comment section after this click on the three line icon at the top right corner of the post.
Instagram comments setting will now be open.
Select the comment setting which you wish to enable after this instagram automatically filter or hide those comments which are spams.
Why can’t I see notes on instagram? Fix 2023
Instagram notes features not showing? Well, I have a fix for that problem!
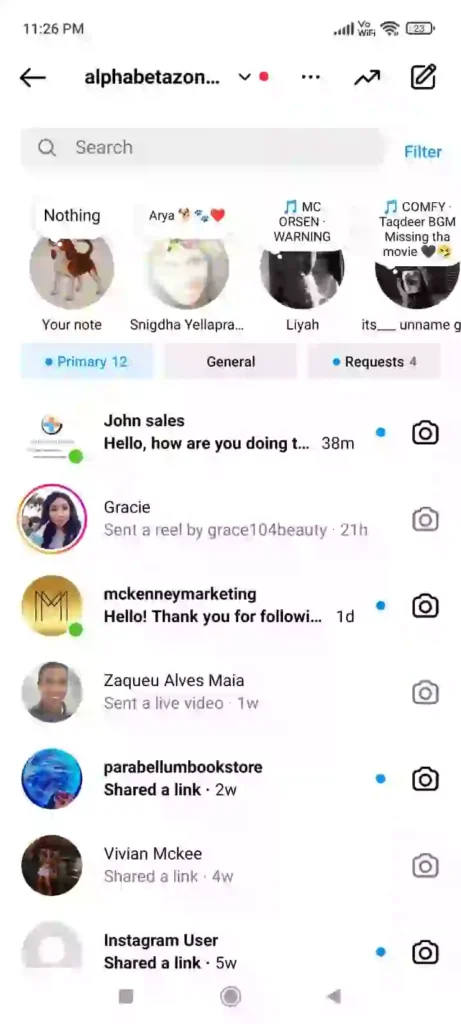
Introducing Instagram Notes, a feature embedded within the Instagram app that allows you to store text-based notes. You can see this feature while clicking on the message icon of instagram app.
Like In my case I had type nothing and share it with my close friends . It is very much similar like whatsapp status where people can see your staus and reply it.
Here you also choose people you wish to share this notes and add song also with that note.
You will find two category of people while sharing a instagram notes first one is the
1: Followers You Follow Back
2: Close Friends : Here you can choose those friend which you want to share your
Instagram notes not appearing in chats? Here’s how to fix it:
If you’re experiencing the issue of Instagram Notes not showing up in your account, there could be several reasons. Below, we’ve listed ten possible causes and their corresponding solutions:
- Outdated Instagram app version: Ensure that you have the latest version of Instagram installed on your device. You can download it from the app store.
2. Feature availability in your region: Instagram may have limited the Notes feature to specific regions. Check if the feature is accessible in your area.
3. Incompatible device: The Notes feature might require a newer device or a specific operating system. Verify if your device meets the compatibility requirements.
4. Outdated device software: Make sure your device’s software is up-to-date in order to access the latest features.
5. Weak internet connection: Check your internet connection, as a poor connection may prevent the Notes feature from loading correctly.
6. Account-related issues: Log out of your account and log back in to resolve any issues associated with your profile.
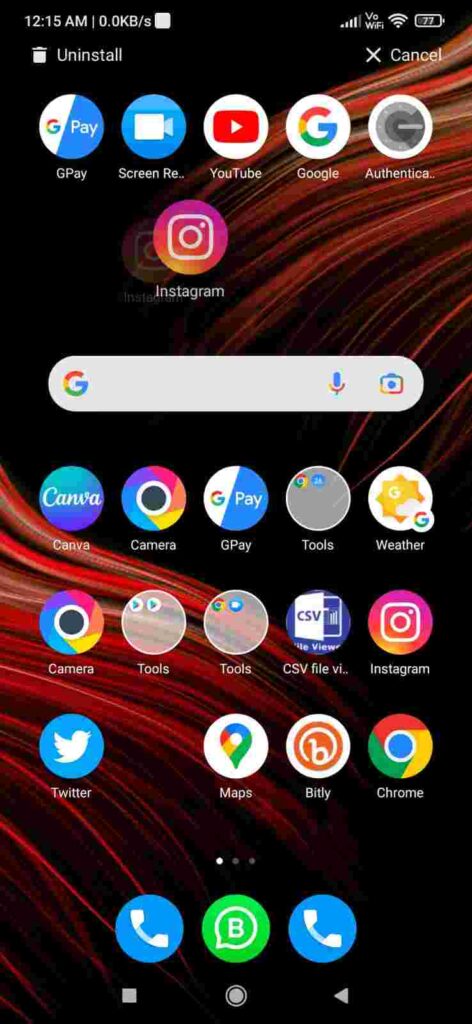
7. App-related issues: Uninstall and reinstall the Instagram app to fix any bugs or glitches.
8. Using an incompatible device: Ensure your device meets the minimum requirements for the Notes feature.
9. Account flagged or disabled: If your account has been flagged or disabled, you may not have access to the Notes feature. Check the status of your account to ensure it is in good standing.

These are the best Quick Fix That Worked For Me:
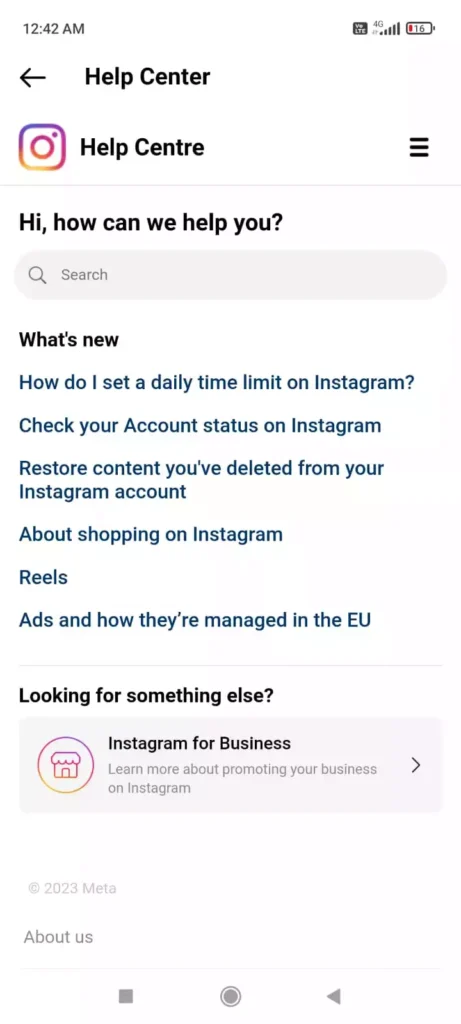
If above instant fixes resolve the issue, consider reaching out to Instagram’s support team for further assistance.
If you’ve already checked all the points mentioned earlier, such as updating your Instagram app, and still can’t use Instagram Notes, the issue could be due to having multiple Instagram accounts on a single device.
In my case, after updating the Instagram app, the Notes feature started working for my main account. However, when I switched to my secondary account, Instagram Notes stopped functioning.
Often, when using multiple Instagram accounts, updating the app only affects one of the accounts. I’ve personally experienced this issue before.
To resolve this, I suggest removing the Instagram app from the background, closing all running app activities, restarting your device, and then reopening the Instagram app. This should enable Instagram Notes to appear in the direct messages (DMs).
This quick tip or hack should be tried if none of the previous solutions work. You may also be interested in reading: How to fix the inability to reply to specific messages on Instagram!
In conclusion:
Today, we’ve provided you with the necessary steps to fix the problem of Instagram notes not working and explained why you may not have access to notes on Instagram. Rest assured that by following these steps, you will likely start adding notes to your Instagram chats.
We hope you found this article helpful.
Why I can’t reply to specific messages on Instagram- Fixing guide 2023
Struggling to Reply to Specific Messages on Instagram? Here’s the Fix!
Having trouble replying to certain messages on Instagram OR can’t reply to specific messages on Instagram- Fixing guide Don’t worry, we’ve got you covered! In this article, we’ll provide you with easy-to-follow steps to resolve this issue. So, let’s dive right in and get those messages flowing again!
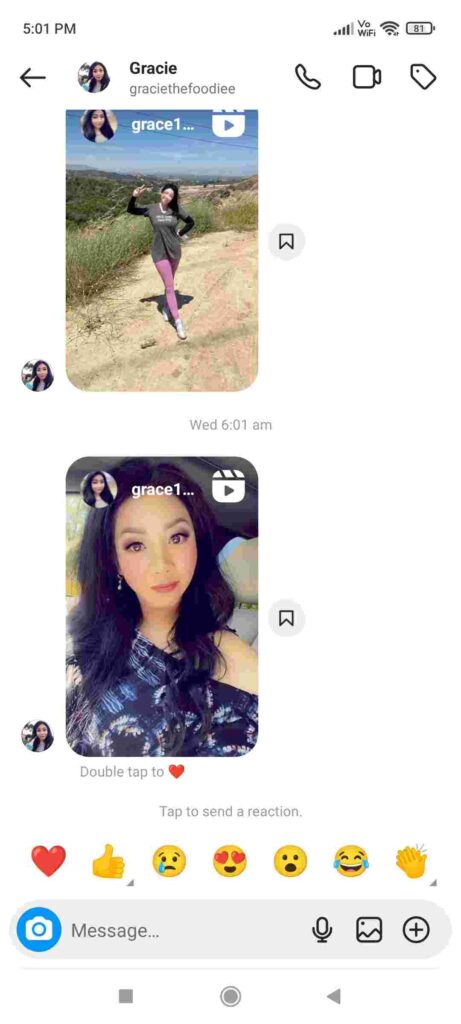
Reasons behind the Inability to Reply to Specific Messages on Instagram
There are a few potential reasons why you might be facing difficulties when trying to reply to specific messages on Instagram. Let’s explore them briefly:
- App Update: Sometimes, failing to update the Instagram app can cause glitches that prevent you from accessing the “Reply” option. To address this, try updating the app or restarting your device to see if it resolves the issue.
- Internet Connectivity: Weak or unstable internet connections can also hinder your ability to reply to messages on Instagram. Consider connecting to a more reliable network to see if that helps.
- Account Restrictions: If you recently violated Instagram’s community guidelines or terms of service, your account may have temporary or permanent restrictions on certain features, including replying to specific messages.
- Account Privacy Settings: Setting your account to private can restrict your ability to reply to messages from users who aren’t following you. Ensure your privacy settings allow you to receive messages from all users.
- Technical Limitations: Depending on your device or the version of the Instagram app you’re using, technical limitations may prevent you from accessing specific features, such as replying to particular messages.
Now that we’ve covered the reasons behind the issue, let’s move on to the solutions.
Fixing the Inability to Reply to Specific Messages on Instagram
If you find yourself unable to reply to specific messages on Instagram, try following these steps:
- Update the Instagram App:
- Aside from the regular app update, there’s an additional step that might help you overcome the issue. Start by logging out of all your Instagram accounts.
This step is crucial because, in some cases, the primary account fails to update despite updating the app. Once you’ve logged out, clear the cache and proceed with updating the app. Because I had see many times if i had three account login on the app some of them will not updated even after updated from playstore.
2. Clear the Cache:
Clearing the app’s cache is an often overlooked step, but it can work wonders. By removing the accumulated junk data, you may resolve the issue.
First step unlock your phone and go to the mobile settings
Now scroll down and click to app section you will see this type of interface.
Now go to the manage app section and search for instagram
After this click on the clear data button
After click on clear data all app data of Instagram including cache will be cleared now.
3. Address Instagram Bugs:
Bugs are a common occurrence in all applications, including Instagram. To tackle this issue, follow these steps:
a.Uninstall the Instagram app.
b. Restart your phone twice.
c. Reinstall the app from the official source.
By diligently following these steps, you should be able to fix the issue of not being able to reply to specific messages on Instagram. Don’t forget to read our comprehensive article on the topic to gain a deeper understanding of the process.
Utilizing Instagram’s Specific Reply Features
Once you’ve resolved the issue, you might wonder how to make the most of Instagram’s specific reply features. We have a video tutorial available to guide you through using these functionalities effectively.
In Conclusion
We hope you found these steps helpful in resolving your Instagram woes. With a little effort and these solutions, you’ll be back to connecting with friends and followers on Instagram in no time. So go ahead, give these steps a try, and enjoy sliding into those DMs like the boss babe you are!
Wishing you a fantastic day ahead!

4 Ways to Unblock Instagram on a School Chromebook
Step By Step Guide To Unblock Instagram On School Chromebook
Instagram is one of the most popular social media platform that allows users to share photos, videos, and connect with friends and influencers. However, many schools restrict access to Instagram on their Chromebooks due to concerns over distractions and inappropriate content. If you find yourself wanting to access Instagram on your school Chromebook, don’t worry! In this tutorial, 4 Ways to Unblock Instagram on a School Chromebook and enjoy your favorite social media platform during your free time.
1: Use a VPN:
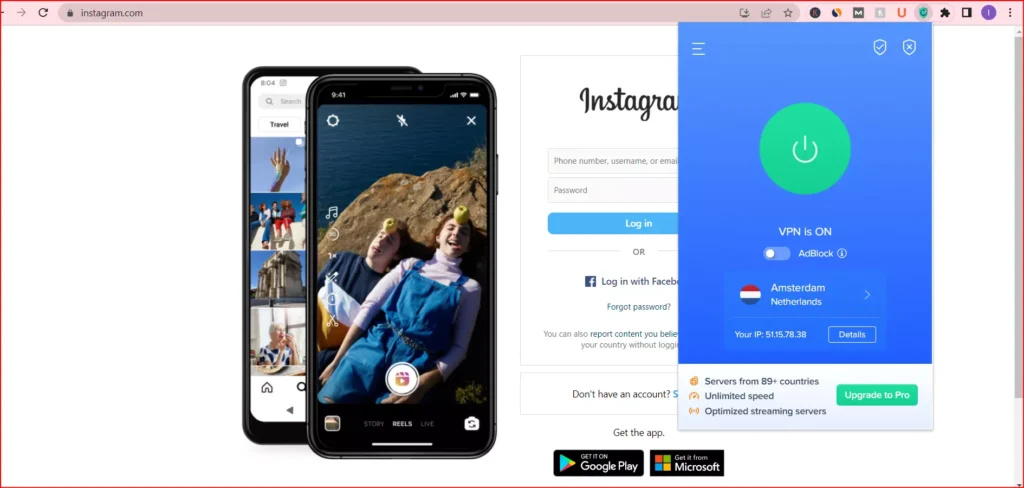
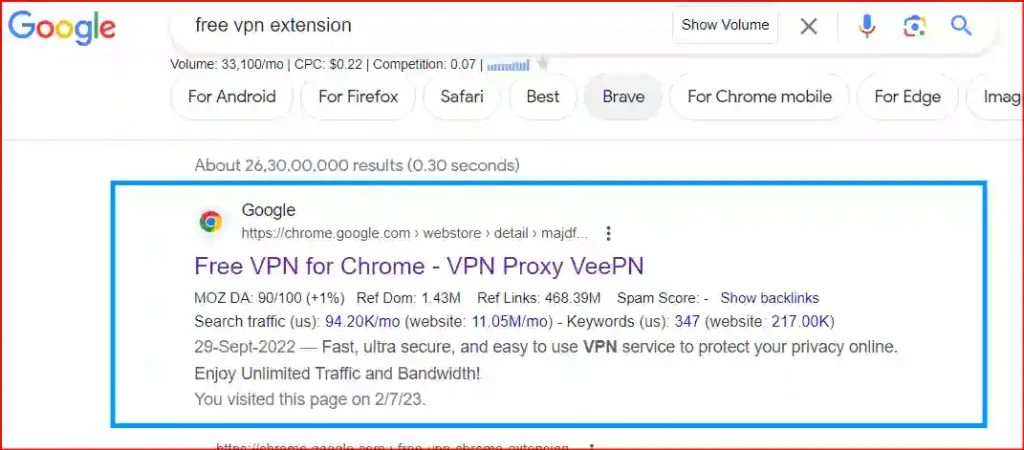
One of the most reliable methods to bypass restrictions and unblock Instagram on a school Chromebook is by using a VPN (Virtual Private Network). A VPN allows you to create a secure and encrypted connection to another network, masking your device’s IP address. By connecting to a VPN server outside your school’s network, you can access Instagram without being detected. There are numerous FREE VPN CHROME EXTENSIONS services available, that you can install as Chrome extensions or standalone applications.
Using a free VPN extension to unblock sites is a similar process to using a paid VPN service, but with a few differences. Here’s a general guide on how to use a free VPN extension:
- Choose a reputable VPN extension: Look for a free VPN extension for your preferred web browser. In my case I had mainly choose this Free VPN for Chrome – VPN Proxy VeePN by veepn.com

2. Install the VPN extension: Go to the web store for your browser (e.g., Chrome Web Store for Google Chrome) and search for the Free VPN extension . Click on “Add to [Browser Name]” to install the extension.
3. Activate & Enable the VPN extension: Once the extension is installed, you’ll typically see its icon in your browser’s toolbar. Click on the icon to open the VPN extension.

4. Choose a server location: Free VPN extensions usually have a limited number of server locations available. Select a server location that is suitable for unblocking the desired site. If the site is blocked in your country, try connecting to a server in another country where the site is accessible.
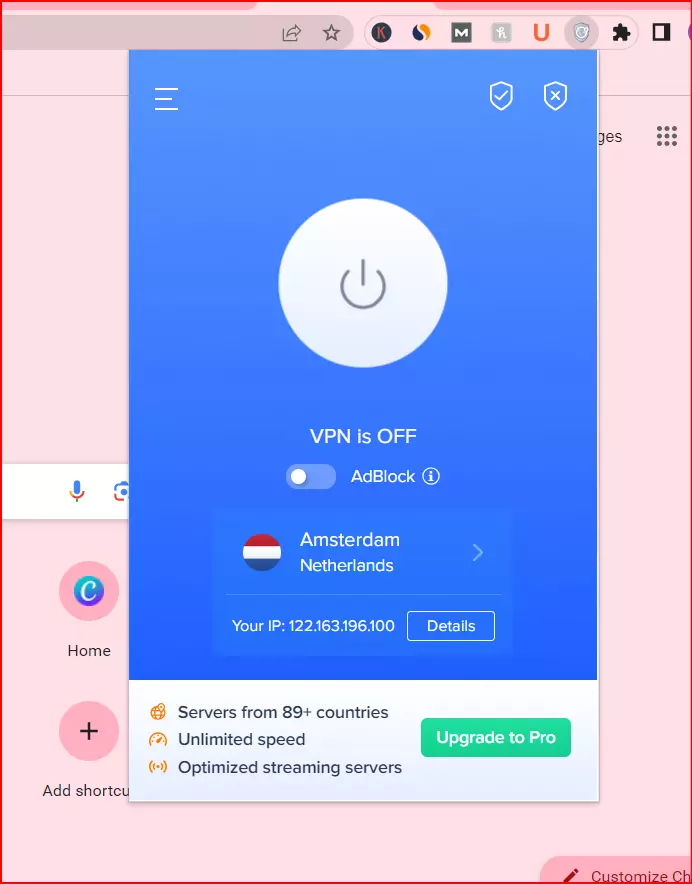
Connect to the VPN server: Click on the “Connect” or “On” button in the VPN extension to establish a connection to the selected server. The button will typically change to indicate that you are connected.
5. Access the blocked site: Once the VPN connection is established, your IP address will be masked, and you should be able to access the blocked site through your browser. Simply type the site’s URL into the address bar, and it should load as if you were accessing it from the server’s location.
It’s important to note that free VPN extensions may have limitations compared to paid VPN services. They may have slower speeds, limited server options, and potentially less reliable connections. Additionally, be cautious when using free VPNs, as some may collect and sell your data or include ads. Consider using a reputable paid VPN service if you require more consistent and secure access to blocked sites.
2. Utilize Proxy Servers
- Another way to bypass Instagram restrictions is by utilizing proxy websites. Proxy servers act as intermediaries between your device and the website you want to access, allowing you to browse anonymously. Several proxy websites enable you to access Instagram by simply entering the URL into their search bar. Keep in mind that some proxies may be blocked by your school’s network, so it’s recommended to try different ones until you find a working option.
- Using a free proxy server can be another way to potentially unblock sites. Here’s a general guide on how to use a free proxy server:
First Search For This Website Show In The Given Screenshot
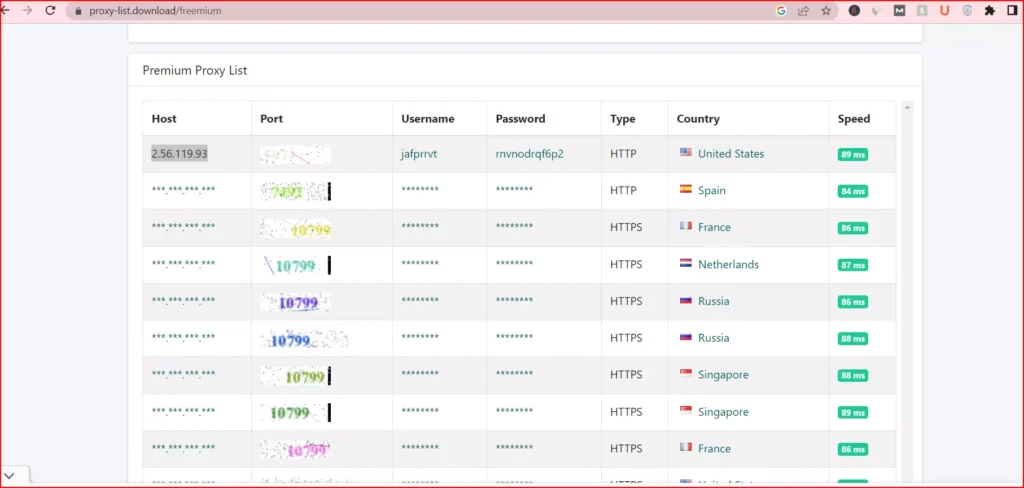
After this copy the Ip address , Username & Password.
Choose a proxy server: Select a proxy server from the list that is located in a region where the site you want to unblock is accessible. In my case I had choose usa vpn proxy.
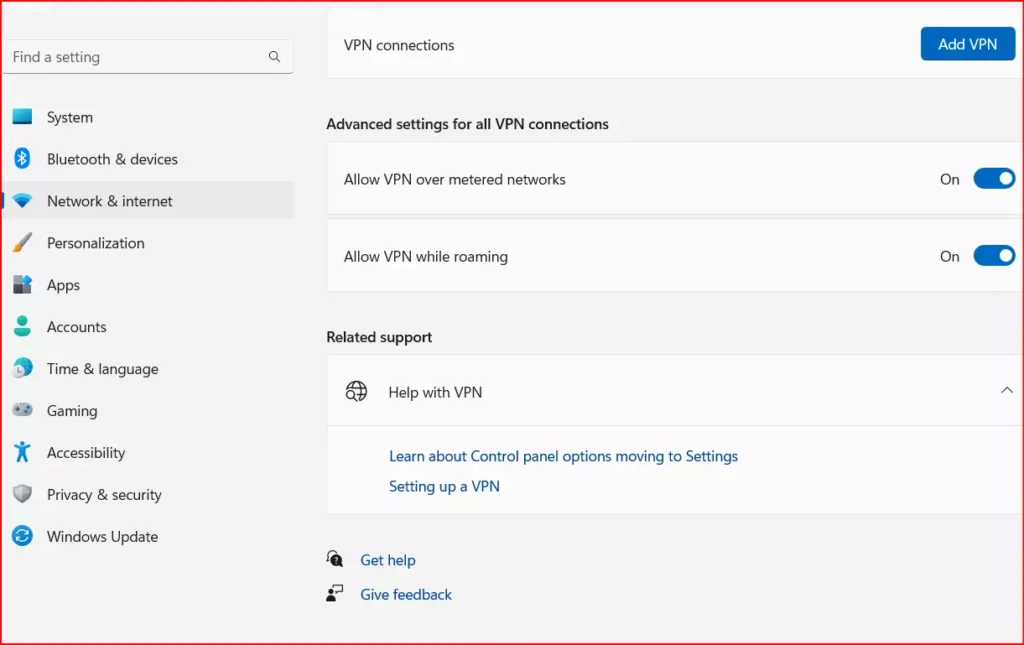
OPEN THE DEKSTOP SETTING FOR NETWORK & INTERNET AND GO TO THE VPN SECTION.
Click On Add Vpn Button
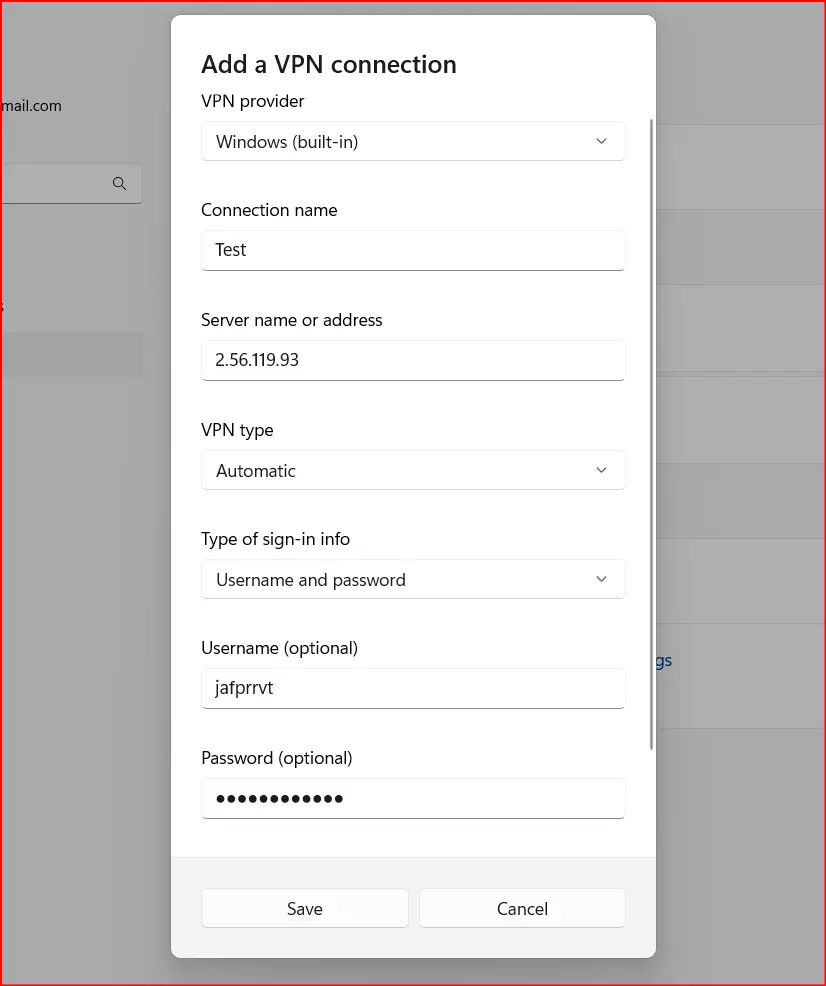
Paste all detail which we copy previously here and click to save button.
After this click to connect button.
Access the blocked site: With the proxy server configured, try accessing the blocked site by entering its URL into your browser’s address bar. Your browser will route the request through the proxy server, potentially bypassing the restrictions and allowing you to access the site.
It’s important to note that while proxy servers can help you access blocked sites, they may have limitations and potential risks. Free proxy servers often have slower speeds, limited server options, and may not guarantee your privacy or security. Additionally, some websites and services may detect and block proxy server connections. Consider using a reputable paid VPN service if you require more consistent and secure access to blocked sites.
3. Use Mobile Wifi :
Here’s a general guide on how to access instagram on a school wifi by using a mobile.
- First unlock your phone and go to the wifi setting of your mobile. Now click to your school wifi setting . In my case I had use my airtel connection and tab on the arrow to open the setting of that wifi network.
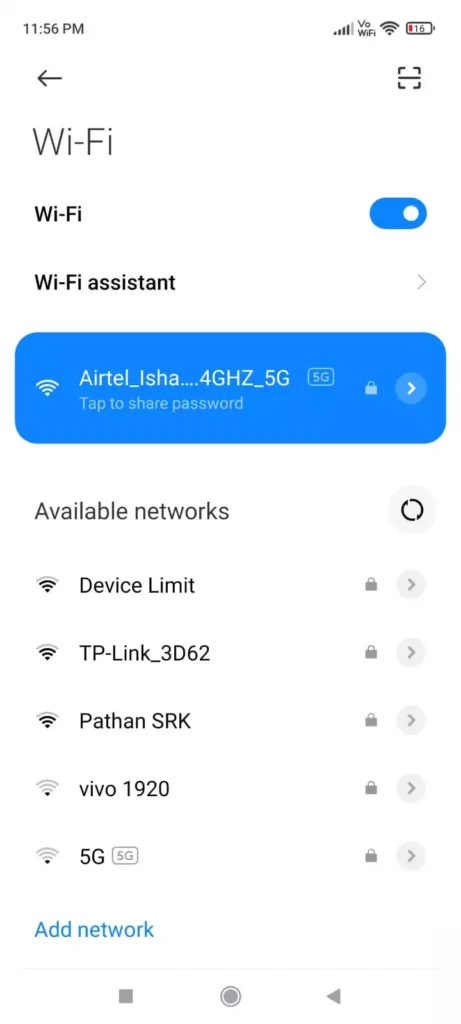
Once setting of your wifi open then you need to scroll and see this type of interface. Here you need to enter the hostname (IP) and port information.
Copy the hostname and port detail from this website and click to tick icon to save the detail. After this you need to enter to go on any mobile browser and search for instagram , now it will ask username and password of that particular Ip which we copy previously.
Once you’re connected to the mobile hotspot, you can attempt to access the instagram websites as you would normally. In most cases, the blocking measures implemented by the network you’re connected.
4. Request Administrative Access:
In some cases, if you have a legitimate reason to access Instagram for educational purposes or if you believe the restrictions are unjustified, you can approach your school’s administration and request temporary or limited access to Instagram.
Explain your reasons clearly and responsibly, highlighting how it can benefit your learning experience. Be prepared to abide by any guidelines or restrictions imposed by the administration if they grant your request.
Conclusion:
While schools often restrict access to social media platforms like Instagram on Chromebooks, there are several ways to unblock them and enjoy your favorite online communities. From using VPNs and proxy websites to utilizing browser extensions and mobile hotspots, these methods can help you bypass restrictions and access Instagram discreetly. Remember to always use these methods responsibly, respect your school’s policies, and prioritize your education.